LangGraph Studio From LangChain
In this article I consider how a LangGraph agent built on LangChain can be deployed from GitHub to LangGraph Cloud. Then use LangGraph Studio to interact with the Agent & visualise the interaction.
LangGraph Basics
LangGraph is a structure to create a flow within a conversational application. The flow can be highly structured or a more agent-like approach.
Something that I have noticed is LangGraph need not introduce rigidity to an application, or be used to create a state machine for the flow. But rather it can also be used to manage the application and act as check points when traces are run on the agent use.
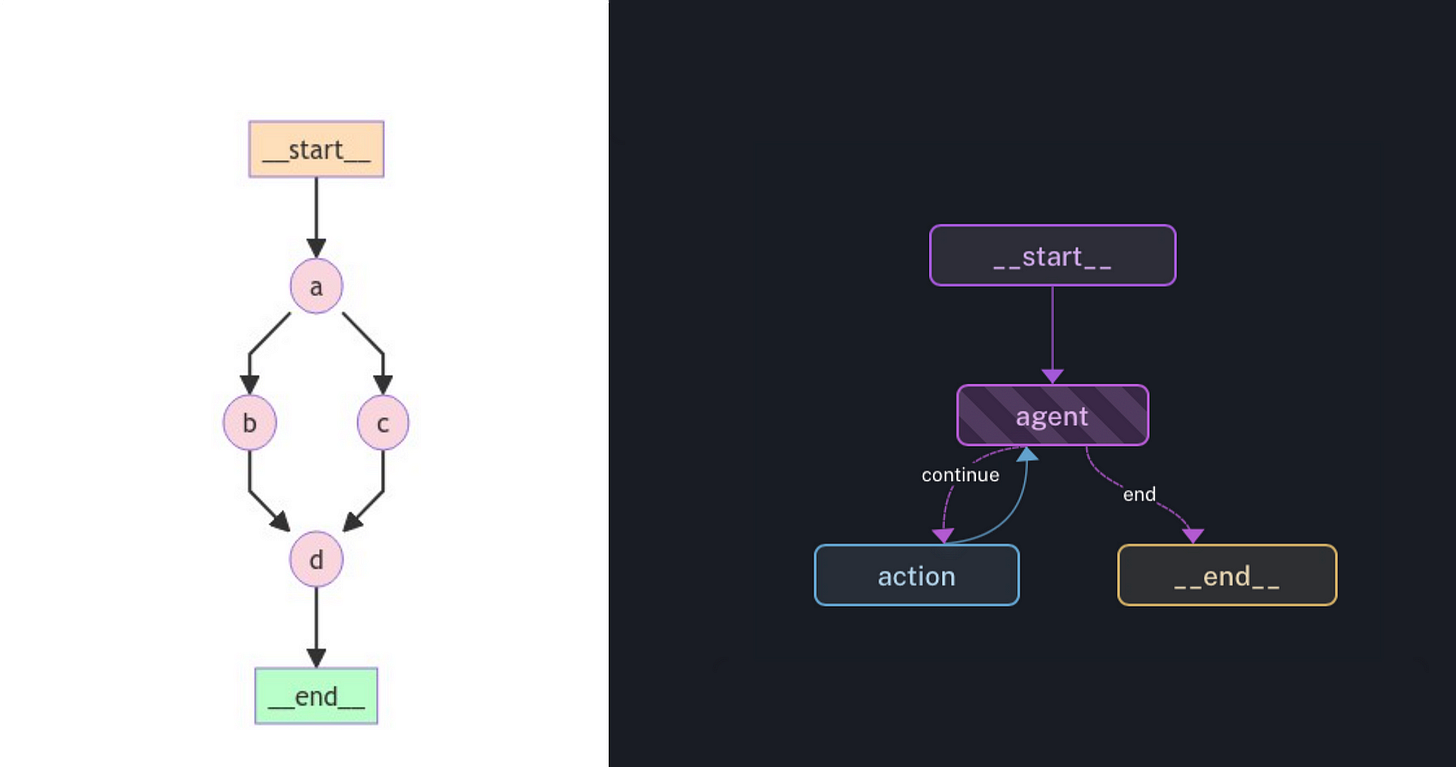
In the image below, on the left is a LangGraph example of a parallel flow, with the sequence of events clearly defined.
On the right is an agent with a start and end node defined; but also with the action portion and the action, which is the web search portion.

Building A Simple LangGraph Structure In Python
Considering the image blow, a snippet of LangGraph Python code is shown on the left, with the graph drawn out on the right.
You can see in the code where the node is defined, builder.add_node with a ReturnNodeValue. For each node having an edge defined builder.add_edge.
It is clear to see that a is set as the entry_point and d as the finish_point.
LangGraph is a module built on the LangChain platform with the aim to enable the creation of cyclical graphs, often needed for agent runtimes.
One of the major value propositions of LangChain is the ability to easily create custom chains, also known as flow engineering. By combining LangGraph with LangChain agents, you can design workflows that are both directed and cyclic.
Here is the complete Python code you can copy and paste in a notebook to play around with, the experiment with LangGraph.
%%capture --no-stderr
%pip install -U langgraph
%pip install httpx

##############################################

import operator
from typing import Annotated, Any

from typing_extensions import TypedDict

from langgraph.graph import StateGraph


class State(TypedDict):
    # The operator.add reducer fn makes this append-only
    aggregate: Annotated[list, operator.add]


class ReturnNodeValue:
    def __init__(self, node_secret: str):
        self._value = node_secret

    def __call__(self, state: State) -> Any:
        print(f"Adding {self._value} to {state['aggregate']}")
        return {"aggregate": [self._value]}


builder = StateGraph(State)
builder.add_node("a", ReturnNodeValue("I'm A"))
builder.set_entry_point("a")
builder.add_node("b", ReturnNodeValue("I'm B"))
builder.add_node("c", ReturnNodeValue("I'm C"))
builder.add_node("d", ReturnNodeValue("I'm D"))
builder.add_edge("a", "b")
builder.add_edge("a", "c")
builder.add_edge("b", "d")
builder.add_edge("c", "d")
builder.set_finish_point("d")
graph = builder.compile()

##############################################

from IPython.display import Image, display

display(Image(graph.get_graph().draw_mermaid_png()))
And below is the structure that has been constructed by the code…
graph.invoke({"aggregate": []}, {"configurable": {"thread_id": "foo"}})Adding I'm A to []
Adding I'm B to ["I'm A"]
Adding I'm C to ["I'm A"]
Adding I'm D to ["I'm A", "I'm B", "I'm C"]
{'aggregate': ["I'm A", "I'm B", "I'm C", "I'm D"]}LangGraph Studio
Below is the LangGraph Studio example code deployed on my LangGraph Cloud Studio environment.
Notice how you can interact with the application, arrange the nodes so the agent flow is more interpretable.
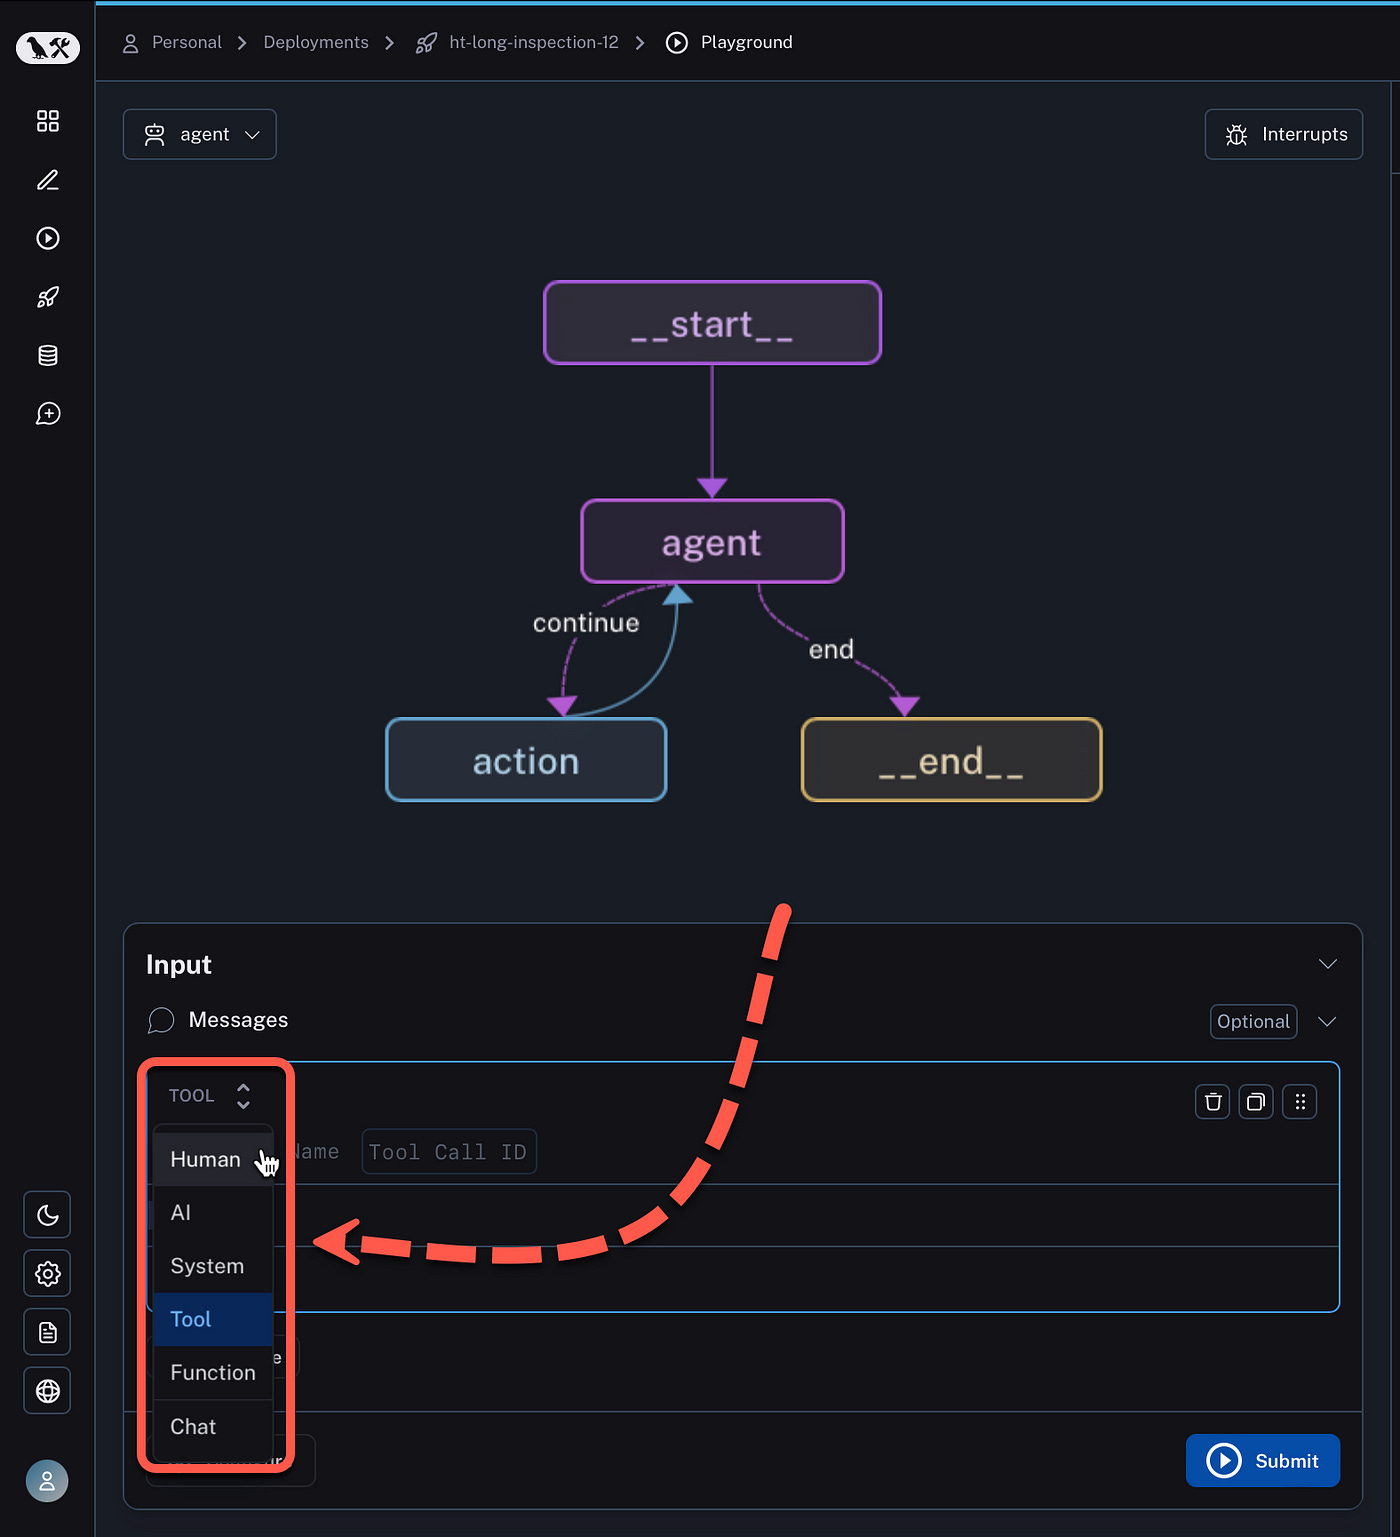
In the dialog interface seen and marked at the bottom of the image, the Configure gear allows you select the OpenAI or Anthropic LLM. The role can be defined of the interaction, the option is Human, AI, System, Tool, Function or Chat.
Consider below how the trace is built out on the right side of the screen as the agent executes. Value information like status, latency and token usage are given on the fly.
There is also an option LangChain refers to as time travel where a maker can go back in time within the conversation and update a value. This feature is great for testing different permutations and also for regression testing.
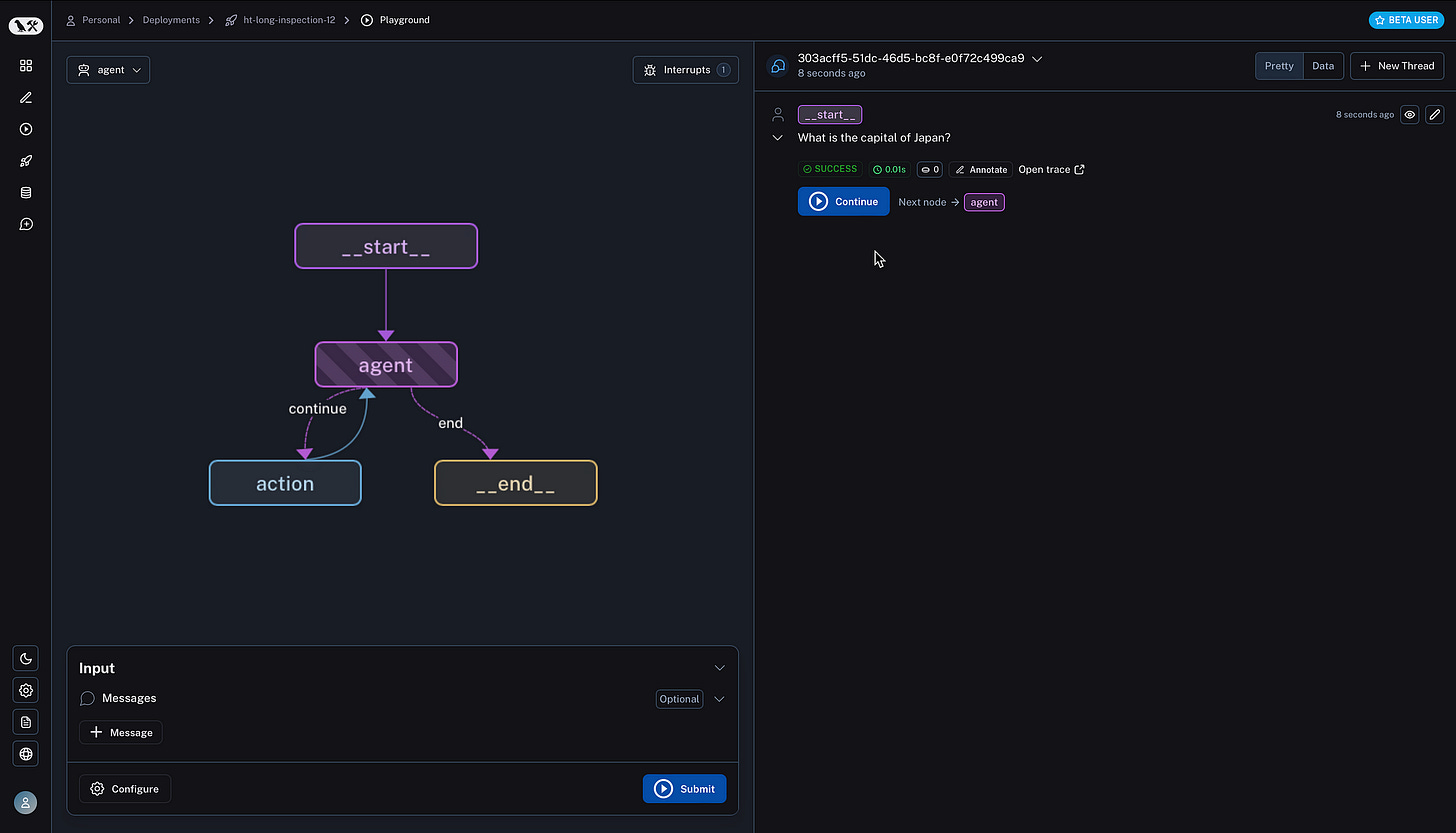
Breaks or interrupts can be added at different nodes, where the execution of the agent will be paused.
Consider on the right the detail can be viewed up until that point, and the user can click on Continue for the execution to resume.
The next node is also indicated.
Recent traces are listed for the LangGraph Cloud application at the bottom of the screen. When a trace is selected, a detailed trace for that interaction is shown on the right.
This trace can be toggled between detailed or shortened. Consider how for each step the duration is given (latency) and tokens used. This is an ideal interface to optimise the efficiency of the Agent.
In Conclusion
It is clear how even a cyclic agent can be optimised and managed by LangGraph Cloud.
LangGraph Studio is an environment to which a GitHub project can be deployed to, and tested and interrogated.
LangGraph Studio is a tool to observe, discover and inspect agent behaviour in detail. It allows for makers to get a thorough understanding of their AI Agent in terms of resource consumption, optimisation and user experience.
I see LangGraph Studio as an ideal tool for collaboration where agents can be tested, traces can be added to datasets, added to annotation queues, shared or directly annotated.
Run ID’s are pared with Trace ID’s to for granular and fine-grained inspection of agent behaviour.
LangGraph Studio is not a development tool, code cannot be edited or updated from the UI.
LangGraph Cloud and LangGraph Studio seem to be a natural extension of the LangSmith, and seemingly LangChain is getting the balance right between the Open Source Software and commercial offering.
I’m currently the Chief Evangelist @ Kore AI. I explore & write about all things at the intersection of AI & language; ranging from LLMs, Chatbots, Voicebots, Development Frameworks, Data-Centric latent spaces & more.


